Sunday, July 31, 2011

Dinosaur Egg Cakeballs

For my son's birthday this week, I decided I would try my hand at cakeballs.  I had heard and read about everyone making cakeballs and how easy & yummy they were, so I thought, "How hard could it be?"  It was pretty easy through the first steps...
Make cake of your choice according to package directions.  Bake.


After cake cools, cut into small squares

Break cake up in a bowl

Crumble cake squares with a fork.  This is the amount of crumbs from the entire cake.

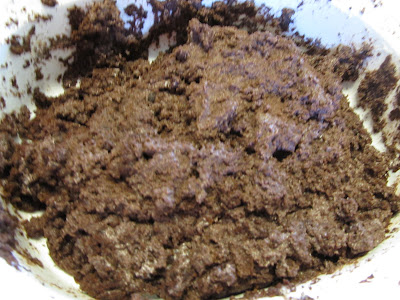
Add an entire jar of your choice of frosting.  I used a Devil's Food cake mix and Cream Cheese frosting.

It doesn't look pretty, but it smells good!  I let this chill for a few minutes before I started to shape the cakeballs.


It makes a ton!  This is about half the batter.  After you get them in balls, freeze them for about 30 minutes.  I found the longer the better.

I used Candy Melts for the coating.  This is where I ran into trouble!  I haven't quite figured out my microwave yet and I just couldn't get the candy melts to melt into the right consistency.  Next time I plan to try the double broiler and hopefully that will yield better results.  All tips are welcome!

I had hoped to use my egg separator as a way of dipping in the coating, but my coating was just too lumpy for this to happen, but I think it's a great idea.


I wasn't super pleased with the way my cakeballs turned out (I wanted them smooth, to better resemble dinosaur eggs), but they tasted good and everyone loved them so that's what matters!!

And there were PLENTY for the party!

However, hubby & I agree, we liked the cakeballs, but my friend Rebekah shared this recipe for Oreo Balls on her blog and they. are. awesome!!  If you like cakeballs, you must check it out!!  We love them more than cakeballs!  And if you like sweets, we have plenty of sugary goodies to share this week!!

Tuesday, July 26, 2011

Reality

Just thought I would throw this picture in, in case you got tired of the try-to-get-perfect-pretty pictures of food.  I give you...what my sink looks like after I make macaroni & cheese.
Just keepin' it real.  Enjoy :)

Sunday, July 24, 2011

Family Favorite Chicken Spaghetti

This is one of our family's favorite dishes!  Everyone eats it and everyone loves it so that's win-win in my book.  It's pretty easy to make and it makes A LOT, so I know we will be eating a lot of this in the future :)  I start out by baking the chicken (the original recipe calls for using a whole chicken, but I use this method for all my recipes that call for cooked chicken, it's just what I've found works best for me)
I just use:
  • boneless, skinless chicken breasts, cut into tenders
  • olive oil
  • sea salt
  • garlic powder
  • pepper
  • chili powder


After I spray the pan with olive oil, I drizzle olive oil over each piece of chicken, then sprinkle sea salt, garlic powder, pepper, and chili powder, on each piece.  Usually, I use sea salt, pepper, and garlic powder, every time I bake this chicken.  For dishes like this one & enchiladas, for example, I add the chili powder, too.  I just love all the extra flavor that all the spices add to each dish.

Bake chicken at 350 for 15-20 minutes, or until juices run clear and it's cooked completely through.  After chicken has cooled enough, chop chicken into small pieces.

In case you're tired of my pretty ingredient pictures, here's one of those "reality" ingredient shots haha

For chicken spaghetti, you'll need:
  • 1 can cream of mushroom soup
  • 2 cups chopped cooked chicken (I usually just use as much as I have)
  • 1/2 onion, chopped
  • 1 green pepper, chopped
  • 1/2 cup milk
  • 2 cups chicken broth
  • 1 tablespoon chili powder
  • 1/2 teaspoon pepper
  • 2 cups shredded cheddar cheese
  • 1 jar chopped pimentos
  •  spaghetti noodles (two small bags of thin spaghetti noodles), cooked according to package directions


Saute onion and green pepper in olive oil

When green peppers and onions are almost cooked clear, add chopped chicken

add chicken broth,

add cream of mushroom soup & milk - I usually mix the milk and soup in the measuring cup before adding, to get all the lumps out of the soup

Continue mixing and heat until bubbly


After bubbly, add pimentos, chili powder, and pepper.  At this point I usually simmer the sauce until the noodles are ready.  I think the longer it simmers, the yummier it is, but it's good either way.  The funny thing is on this day, I could not get the pimentos open for. the. life. of. me.  And hubby had to work late so this batch went sans pimentos.  I tried everything, and that jar just wouldn't open!  

Once the noodles are ready, mix with sauce and add a cup of cheese (more or less if you like :).  Pour in a greased (I use olive oil spray, again) 9x13 glass pan.  Add the remainder of the cheese to the top, cover and bake in 350 degree oven for 10-15 minutes.  Until cheese is melted and sides are bubbly.

It is delish!!  Hope you love it!  I usually top mine with chopped green olives, but hubby likes his sans green olives, so whatever you like, you can't go wrong!  I wish I had a picture of the chicken spaghetti when I served it, but it was Friday night, hubby was working late & this mama was worn out so this is the best picture I could get - ha!  Happy Eating!

Friday, July 22, 2011

Whatcha Got Pasta Salad

Some of you may find this dish strange or weird, but I promise you, it was yummy!!  And the best part of it was it totally came together by accident!  The name of it is exactly what happened - I just used stuff I had around to make this pasta salad at lunch.  So easy, it came together so simply, and it was SO good!  My son said, "Daddy wouldn't like this, but we like it, right?"  Right you are, son, Daddy wouldn't touch this salad with a ten foot pole, but it sure was good for our lunch today!  So good my son asked for seconds again - the true test of whether or not it's good.  Now trust me on this one, I used:
  • Wacky Mac (use however much you want and cook to package directions.  Wacky Mac is great bc it's noodles made of veggies, so my child is eating veggies without knowing it - score)
  • Leftover Cucumber Salad (you remember that from last night??  Yes, that salad!)
  • Cherries (yes, you read that right)
  • shredded cheddar
  • Olive oil
  • Garlic Powder (bc this blog should be renamed "Garlic Powder Cooking")
  • Sea Salt

I cooked the Wacky Mac to package directions, about 14 minutes.  Drain, then rinse well with COLD water in colander

I used a handful of cherries and just chopped them up.  I usually put raisins in my pasta salad and since I didn't have any raisins, these were perfect.  I never would've tried it otherwise, but it really worked so I was glad about that.

Yep, here's the leftover cucumber salad from yesterday.  I dumped the noodles in the colander, rinsed them, then dumped the cucumber salad right on top so all the stuff would drain.  But you don't really have to drain it bc all those juices would probably just add good flavor to your salad.

Then I put it in my bowl, added the cherries, and since this is our house, a handful of cheese (which btw, the reason we have so much cheese lately is bc Albertson's was having a really good sale this week.  On cheese :).  Then I tossed it in olive oil (just enough to coat), sprinkled with garlic powder and sea salt, and chilled it for a few more minutes while I got everything ready for lunch.


Isn't it pretty??  Do y'all think I'm crazy?!?  It was SO good!  

Don't forget to add yourself as a follower over on the right side, or leave a comment & tell me what you like or don't like/what works or doesn't work - just so I know I'm not just talking to myself - ha :)

Wednesday, July 20, 2011

Baked Macaroni & Cheese and Cucumber Salad

So, I haven't posted in a few days, but it wasn't bc I wasn't cooking!  It was bc I figured all of you know how to make spaghetti :)  

Now, if you're watching your carbs or have an aversion to dairy, then just skip this first recipe and go straight to the next one - this macaroni and cheese is sinful!!  While I was cooking this, my son said from the other room, "Something smells yummy in there"!

I had originally tried to make the macaroni & cheese from the red & white Betty Crocker cookbook, but certain palates in our house did not like the addition of onion to the macaroni, so they requested just cheese sauce & noodles - so here is the result!  I added the garlic powder and pepper just for a little added flavor.  I started with the white sauce recipe from the Betty Crocker cookbook and then doubled it, but I think you could even triple it if you wanted to, since it's baked.  But either way, it's delicious!

Here's what you'll need:
  • 2 cups shredded sharp cheddar
  • 2 cups shredded mild cheddar (yes, that's two bags of cheese - if you'd like it lighter, feel free to use less cheese :)
  • 12 oz. bag Large Elbow Macaroni, cooked according to package directions
  • 2 tablespoons butter
  • 1 and a half cups milk
  • 2 tablespoons flour
  • sea salt (can be omitted, I used just a little)
  • black pepper (to taste)
  • about 1/2 tsp garlic powder (more if you like garlic, less if you don't)


Melt butter over low heat and add flour to make a roux.  This always intimidates me, but it's much easier than it sounds & I've never burned it so I figure it's not as hard as it initially seems :)
Once the roux is ready, add the milk all at once.  Turn up the heat and continue to stir until thickened and bubbly (about 5 minutes).

Once thickened, add sharp cheddar cheese (you can use whatever cheese you like, I just think the sharp cheese gives the macaroni better flavor) and stir until melted.  Remove from heat. (And I covered it until I was ready to pour it over the macaroni)


After draining the macaroni, mix with sauce

And pour in a greased baking dish (I spray mine with olive oil)

Then add more cheese!!  Haha!!
I use mild cheddar on top -  mmmmmmmm - we are a cheese loving family so this is what works for us

Bake in oven at 350 for 10-15 minutes, or until cheese is melted and sides are bubbly


Sinful, sinful, sinful...

And on to the lighter part of the meal!
I became a huge fan of this salad when we went to Israel several years ago.  It's so easy, but SO good!  The perfect summer salad.  My child loves it so much that he had THREE servings of it tonight at dinner! Crazy!  And it's so easy to make.  So easy that these measurements are just kind of estimates & you just can't mess it up -   
You'll need:
  • 1 cucumber
  • 2 tomatoes
  • about a tablespoon or so olive oil
  • sea salt
  • 1/4 tsp garlic powder


Peel and dice the cucumber


dice the tomatoes (sometimes I seed them, sometimes I don't - today I did half and half bc I was being indecisive ha)

Add olive oil (toss to coat), a few cranks of sea salt and garlic powder.  I'm starting to think that I have an unnatural affection for garlic powder, since I add it to everything.  It just makes it better!  Anyway, chill until ready to serve.  Perfect summer salad!

Isn't this plate colorful?  Yes, we had blueberries with our dinner tonight bc that's how we roll at our house.   

Let me know if you like the salad!

Saturday, July 16, 2011

Oven Fried Chicken

Don't let the name of this dish fool you - there is no frying involved!  I took a chance and made up my own recipe with stuff I had in my pantry and it was actually good!  Not only was it good, but when hubby came through the front door he said, "Something smells good!" - and it was!  Also, I served green beans with this and included that recipe below.  If you're making this chicken & the green beans, start the green beans cooking first, then move onto the chicken.  It will make sense as you read on, but that's just my extra tip.  So here we go...
You'll need:
  • 1 cup plain bread crumbs
  • 1 tbsp black pepper
  • 1 tbsp garlic powder
  • 1/2 tbsp salt (more if you like - all these are approximate, if you like more pepper or garlic pepper, add it!  You really can't mess it up)
  • 3 eggs
  • flour (probably a cup or two)
  • 1 1/2 - 2 lbs boneless skinless chicken breasts, cut into tenders
**Also, make sure to spray your cookie sheet with some type of cooking spray.  I use my trusty olive oil spray, but anything will do.  Preheat oven to 350


To make this chicken, I set up my assembly line to make it as efficient as possible - I can never be too efficient when trying to cook with two little people bopping around the kitchen

Chicken and flour - I cut the chicken into tenders myself - that's why they're all different sizes and shapes :)  If you are looking for all little more uniformity, put the chicken in the freezer for about 15-30 minutes, it will make it easier to cut in more equal sizes - or just buy the chicken tenderloins

Eggs (whisked with fork), and breadcrumb mixture (breadcrumbs, pepper, garlic powder, and salt, mixed up)

First I rolled the chicken in flour, dredged them in the eggs, then rolled them thoroughly in the breadcrumb mixture - it's messy, but easy!  And your fingers will look like E.T.'s by the time you're halfway through, but that just means you're doing it right!  Here's the chicken before I put it in the oven at 350 for 30 minutes (or until it's cooked through - I'm paranoid about undercooked chicken so I usually cut through the thickest parts and check for white all the way through just to make sure)

Here is the chicken out of the oven - not super beautiful, but it tastes great!!  I wonder if brushing the tops with egg wash would make it more golden brown??  I might try that next time :)  
Now for one of the sides, I went easy - 

You'll need:
  • two cans of green beans
  • one onion (I love sweet onions, but you can use whatever you like)
I know you're thinking, what's the big idea??  But, I promise, these green beans are yummy!  My distant relatives (like two generations ago) in Kentucky, I believe, cooked their green beans this way (probably not Del Monte, but whatever) so this is how my mom always made them - easy & good!


Start by chopping the onion


Dump in the green beans, dump in the onions.  Cover, heat.  Once it's boiling and the onions have begun to soften, they are easier to mix into the green beans.  Mix them up and continue to simmer.  The longer the better (yes, all the nutrients are probably completely cooked out of the green beans, but that's how we do it).  

Once the rest of your meal is ready, add a couple pats of butter, mix and serve.  Let me know if you like these!  Everyone in my family LOVES these green beans (even the little people)!

And here's the finished plate!  I didn't think the chicken was all that to look at, but it tasted great!  And we had the green beans & rice, as well.  Yes, that is rice-a-roni, chicken flavor.  When I said this was a cooking blog, I didn't say it was a gourmet cooking blog and I'm not ashamed to say we love us some rice-a-roni at our house!

What do you think?  Will you be trying the oven fried chicken?