Showing posts with label cheese. Show all posts

Thursday, July 26, 2012

Green Chile Chicken Casserole

Soooo, it's been awhile since I've posted!  Summer has been busy!  Here's an easy favorite that feeds our family these days.  
For this recipe, you'll need:
  • 1 10 oz can green chile enchilada sauce
  • 1 4 oz can green chiles (I usually use MILD, but if you're brave - go for it!)
  • 4 oz block of cream cheese (half of the block)
  • 2 cups (or so) chopped cooked chicken
  • 1 cup shredded cheese (I used colby jack this time, but monterey jack or anything would work, choose what you like)
  • tortilla chips


Mix first 4 ingredients in a pan on stove and heat through.  Sprinkle a layer of crushed tortilla chips in greased pan, top with half of chicken mixture.  Repeat the layers and top with tortilla chips and cheese.  
Bake for 10-15 minutes at 400 degrees or until a nice crust forms on the top - then you'll know it's ready!

Tastes like a yummy enchilada, without so many steps!  Great for weeknight dinner with corn - easy dinner for the family.  Enjoy!

Sunday, April 1, 2012

Oven Baked Chicken Nuggets

Here's another recipe from my Everyday Food magazine - and another super easy one that my family gobbled up! I doubled the dry ingredients from the original recipe & added my favorite garlic powder (bc that just makes everything better, no?), and it worked just great for us.
For this recipe, you'll need (quantities have been doubled, so if using less chicken, cut dry ingredients in half):
  • about a pound of boneless, skinless chicken (I used almost 2 lbs of boneless, skinless, tenders, which is why I upped the dry ingredients, to coat all the chicken)
  • 2 cups Panko (japanese breadcrumbs)
  • 2/3 cup grated parmesan
  • 1/2 tbs garlic powder
  • coarse salt
  • 2 tbs vegetable oil
  • 1 cup all purpose flour
  • 3 large eggs, lightly beaten
  • cooking spray

Preheat oven to 400 degrees. Spread panko on rimmed baking sheet and bake until golden brown (6-8 min). Immediately put in a separate dish and add parmesan, garlic powder, and salt. Add oil and mix to combine. Increase oven temp to 450 degrees.

Organize your food prep station: cut chicken into 2 inch pieces, place flour, eggs, and panko in separate dishes. This is easiest for me when I have everything in order and it ends up at the baking sheet, ready to pop in the oven!

Set up a wire rack on a rimmed baking sheet, coat with cooking spray (I used olive oil again), at the end of your assembly line. Then coat chicken with flour, dip in egg, coat with panko, place on rack.

Here's what my nuggets looked like before I put them in the oven.

Bake chicken at 450 degrees until cooked through, about 12 minutes (two 6 minute increments), but flipping halfway through. This step is somewhat annoying, but I used tongs & it was relatively easy, then I popped it back in the oven for the remaining 6 minutes.

And here's a quick picture before we ate! Good food enjoyed by all!

Thursday, February 16, 2012

Pepperoni Calzone

One of my friends shared this recipe with me and I couldn't wait to try it!  The original recipe calls for sausage, but since I prefer pepperoni, I thought I'd try to change it up a bit.  Plus, I didn't have parmesan cheese, but it was fine without it.  I'm sure that would add great flavor, but I didn't have it on hand that day.  Also, instead of minced garlic, I used fresh.  Turned out great!  And better yet, the fam LOVED it!  This was perfect for an easy weekday meal, but I also think it would be great for football watching parties in the fall or whenever!

For this super easy yummy recipe, you'll need:
  • 1 lb frozen bread dough
  • pepperoni
  • 1 cup ricotta cheese
  • 3/4 cup mozzarella
  • 1/2 tsp dried basil
  • 1-2 cloves garlic, smashed
  • 1 egg
  • olive oil 
  • italian seasoning (to taste)
  • garlic powder (1/4 tsp or to taste)

If you're grocery-shopping-challenged like me, you'll want to know that this is what the dough looks like.  It can be found in Cowtown at Tom Thumb (this is the only place I've found it - and I looked 3 other places!!  So take my advice friends, just go to Tom Thumb on Bryant Irvin & it's right there in the freezer case! :)  Plus it comes in a pack of 3, so I don't have to go back for awhile :)

I just took a loaf out the night before and put it in a covered dish in the fridge.  The next day it looked like this.

Since I was using pepperoni, I decided to crisp them up a bit.  I used about half a package of the pepperonis and sauteed them in olive oil, kind of like bacon - smelled yummy!!!  Remove from pan and drain on a paper towel, but SAVE THAT OIL for the next step...

Throw the garlic in the pepperoni infused oil to soften it for a few minutes before mixing it up in the recipe.  I love combining all the flavors in the oil!

Mix the ricotta cheese, basil, garlic and egg thoroughly and spread onto the dough.  I shaped the dough into a rectangle on a lightly greased baking sheet.  I used olive oil spray to grease it and it worked great.

After the ricotta mixture, layer the mozzarella cheese and pepperonis (or sausage, or whatever you're using :)

Fold the calzone over and pinch the sides to seal.  Then, I mixed olive oil with italian seasoning and garlic powder and brushed it on the outside of the calzone for flavor.  This wasn't part of the original recipe, I just thought it would add a little more flavor to the yumminess - and there's never too much garlic powder in my kitchen, right?  

Bake for 20-30 minutes in a 350 degree oven until browned.  I thought it came out looking fabulous!

This side looked a little wonky, but the rest of it looked fabulous!  Haha!! 


Now hubby & little person absolutely LOVED this dinner!  And so easy!!  We will be having this again for sure!

I also heated up some tomato sauce with basil, italian seasoning, and of course garlic powder, for dipping - so yummy!  And super easy (have I said that already??)

Enjoy!!

Wednesday, January 25, 2012

Texas Mac and Cheese

This recipe is very similar to this recipe, but I made a few changes & it was so yummy that I had to share! I'm also happy to share that the family LOVED this take on macaroni and cheese & I loved that it had great flavor!  Not just same old mac n cheese, friends!  For this super yummy macaroni and cheese, you'll need:
  •  24-32 oz uncooked elbow macaroni
  • 2 1/4 cups milk
  • 3 tbs flour
  • 3 tbs butter
  • about 2 1/2 cups shredded sharp cheddar
  • 1/2 tsp pepper
  • 1/2 tsp chili powder
  • 1/4 tsp garlic powder (more if desired, I just didn't want it to over power the mac)
  • about 1/2 cup crushed cheddar crackers (I used cheez-its, but I've also used goldfish :)

Cook macaroni according to package directions.

Melt butter over medium heat and thoroughly mix in flour.  See previous recipe for pics on how to make the roux and sauce.  Add milk all at once.  Cook and stir over medium heat till thickened and bubbly.  Lower heat and add 2 cups of cheese until melted.  Add pepper, chili powder and garlic powder.  Mix thoroughly.    

Drain macaroni and add to sauce.  Pour in a greased (I use olive oil) baking dish.  Sprinkle remaining 1/2 cup of shredded cheese on top.  Sprinkle crushed crackers on top of cheese.

Bake in preheated 325 degree oven for 10-20 minutes, until bubbly and cheese is melted.
Our mac has half crackers bc our house is a house divided on liking the crackers.  I think they are so yummy, but, ahem, some members of the family prefer no crackers (even though they eat them in the leftovers lol)

Served with fresh broccoli - sooooo goooooood!!  Enjoy, Cowtown Friends!

Friday, January 20, 2012

Broccoli Feta Pasta

As you have probably noticed, I'm having a hard time adjusting to 2012!!  Hard for me to get into the swing of things bc 2012 has been cRaZy at our house and I've found myself just trying to keep up!  So here is a fabulous recipe that my husband and I stumbled upon on the Food Network one weekend.  It's a Sara Moulton recipe & it's super fast, super easy, and super yummy!  My family loves it!  And I love it because it's SO easy!
You'll need:
  • 5 oz crumbled feta cheese
  • pinch (to taste) crushed red pepper
  • 2 cups chicken broth (or vegetable broth)
  • 13.25 oz thin spaghetti (or angel hair)
  • 2 heads fresh broccoli


So easy:  just steam cook your broccoli in a small amount of boiling water until desired tenderness.  I had forgotten how fresh broccoli goes from a dull green to a brilliant green in just a few minutes!  I'm a nerd, but I think it's so pretty!

Then, boil your spaghetti (original recipe called for angel hair, but all I had was thin spaghetti & it worked fine) for half the time on package.  Drain spaghetti and put it the boiling chicken broth (original recipe called for veggie broth, but I used my homemade chicken broth that I have sitting in my freezer awaiting times like these).  Cook for a few more minutes in the broth until pasta reaches desired doneness.

Add cheese and crushed red pepper.  Mix thoroughly and serve.

My picture isn't that fabulous bc I was SO hungry and ready to eat!  The Mister loved this recipe and I loved that it took about 15 minutes from start to finish with practically zero prep!  Plus, I used whole grain spaghetti plus the fresh broccoli, I have to believe it's pretty healthy :)  

A good way to start the new year!  I'm hoping this is the beginning of more consistent posts on Cowtown Cooking in 2012 :)  Happy New Year!

Sunday, December 4, 2011

Ham and Green Bean Savory

Alright, obviously December has gotten the best of me and the blogging is falling behind.  I love the busy-ness of December, but it seems like each year is crazier than the last!  Crazy in a good way, of course ;)  But never fear - just eat some of this awesomeness and it will calm you right down and put you in your happy place.  This is an old family recipe that sounds kind of strange, but trust me, it's comfort food at it's best!!

For this recipe, you'll need:
  • 3 cans cut green beans
  • 2 cups grated sharp cheddar
  • 2 cups (or more/less) cubed ham
  • 3 tbs butter
  • 3 tbs flour
  • 2 1/4 cups milk


Melt butter and flour in saucepan, making a roux

Stir in milk all at once.  Cook and stir over medium heat until thickened and bubbly.  Cook one minute more.  You really have to watch this so as not to burn it.  I always come so close to burning it, so this is my advice from experience :)

Over low heat, stir in shredded cheese until melted

Add (drained) green beans and ham.  Continue to cook and stir until all heated through.

For those of you who haven't had this before, I know it looks a little strange, huh??  But trust me - it's SO yummy!!  We usually eat this with cornbread, but we didn't have cornbread so I decided to change it up - I think I may have started a new tradition...

Because ham & green bean savory with BISCUITS was absolutely AWESOME!!  Biscuit recipe coming SOON!  Enjoy!!

Thursday, November 3, 2011

Taco Soup

I made this on Halloween, the perfect fall soup!  This soup is even acceptable to the mister bc it's definitely hearty!  It's a Paula Deen recipe so you know it's that good!  And easy?  Yes!
For this soup, you'll need:
  • 2 lbs ground beef (I used about a pound and a half)
  • 2 cups chopped onion
  • 2 - 15 1/2 oz cans pink kidney beans
  • 2 - 15 1/2 oz cans pinto beans
  • 1 - 15 1/2 oz can of niblet corn, drained
  • 1 - 14 1/2 oz can Del Monte mexican tomatoes*
  • 1 - 14 1/2 oz can Del Monte tomatoes with chilies*
  • 1 - 14 1/2 oz can diced tomatoes
  • 2 - 4 1/2 oz cans diced green chilies*
  • 1/2 cup green olives, sliced - optional
  • 1 - 1 1/4 oz pkg taco seasoning mix
  • 1 - 1 oz pkg Hidden Valley Original Ranch salad dressing mix
  • Corn chips
  • Sour cream
  • grated cheese
  • chopped onions
**I used 2 cans of Rotel instead of the Del Monte tomatoes, I couldn't find them
**I used one - 7 oz can of diced green chilies


Brown meat with onion, drain fat.

Pour in beans, corn, tomatoes, chilies, olives, and seasonings.  If using crockpot, cook on low for 6-8 hours or simmer on low heat for an hour in stockpot for an hour.  I simmered mine on the stove for a little more than an hour.

To serve, we tested fritos on the bottom, before ladling the soup, or topping soup with fritos.  Both me & the hubby agree, topping with fritos is better than putting fritos first - the crunch was much better to us than soggy chips!

After the chips, I also topped it with sour cream, shredded cheddar & green olives.  I guess black olives would work, too, but this mama gets grossed out by black olives so they don't make it to anything cooked in this kitchen :)

Doesn't it look yummy?!?  Totally Yummy!!

Saturday, October 8, 2011

Breakfast Tacos...for Dinner

I LOVE this meal!!  I love it because it's simple, easy, the possibilities are endless, it's super yummy, and...I didn't cook it!  Haha!  The hubby did the cooking!  Score!  (I did notice that he didn't do the clean up, as well, but Rome wasn't built in a day :)

We were in need of dinner on Saturday night and had all these ingredients so it came together nicely!  The pic shows flour tortillas, but we also had corn tortillas (leftover from the King Ranch Chicken) and I loved it with the corn tortillas!  Such a yummy change!  I plan to have these on the menu more often now that I realize how simple & easy they are.  (And bc Hubby will cook the eggs :)
For this you'll need:
  • eggs
  • milk
  • shredded cheese (we used mexican blend and cheddar)
  • green pepper, diced
  • butter
  • pepper (to taste)
  • tortillas (corn or flour)
  • your favorite salsa
  • sour cream, optional
  • guacamole, tomatoes, pico de gallo, really the possibilities are endless!!


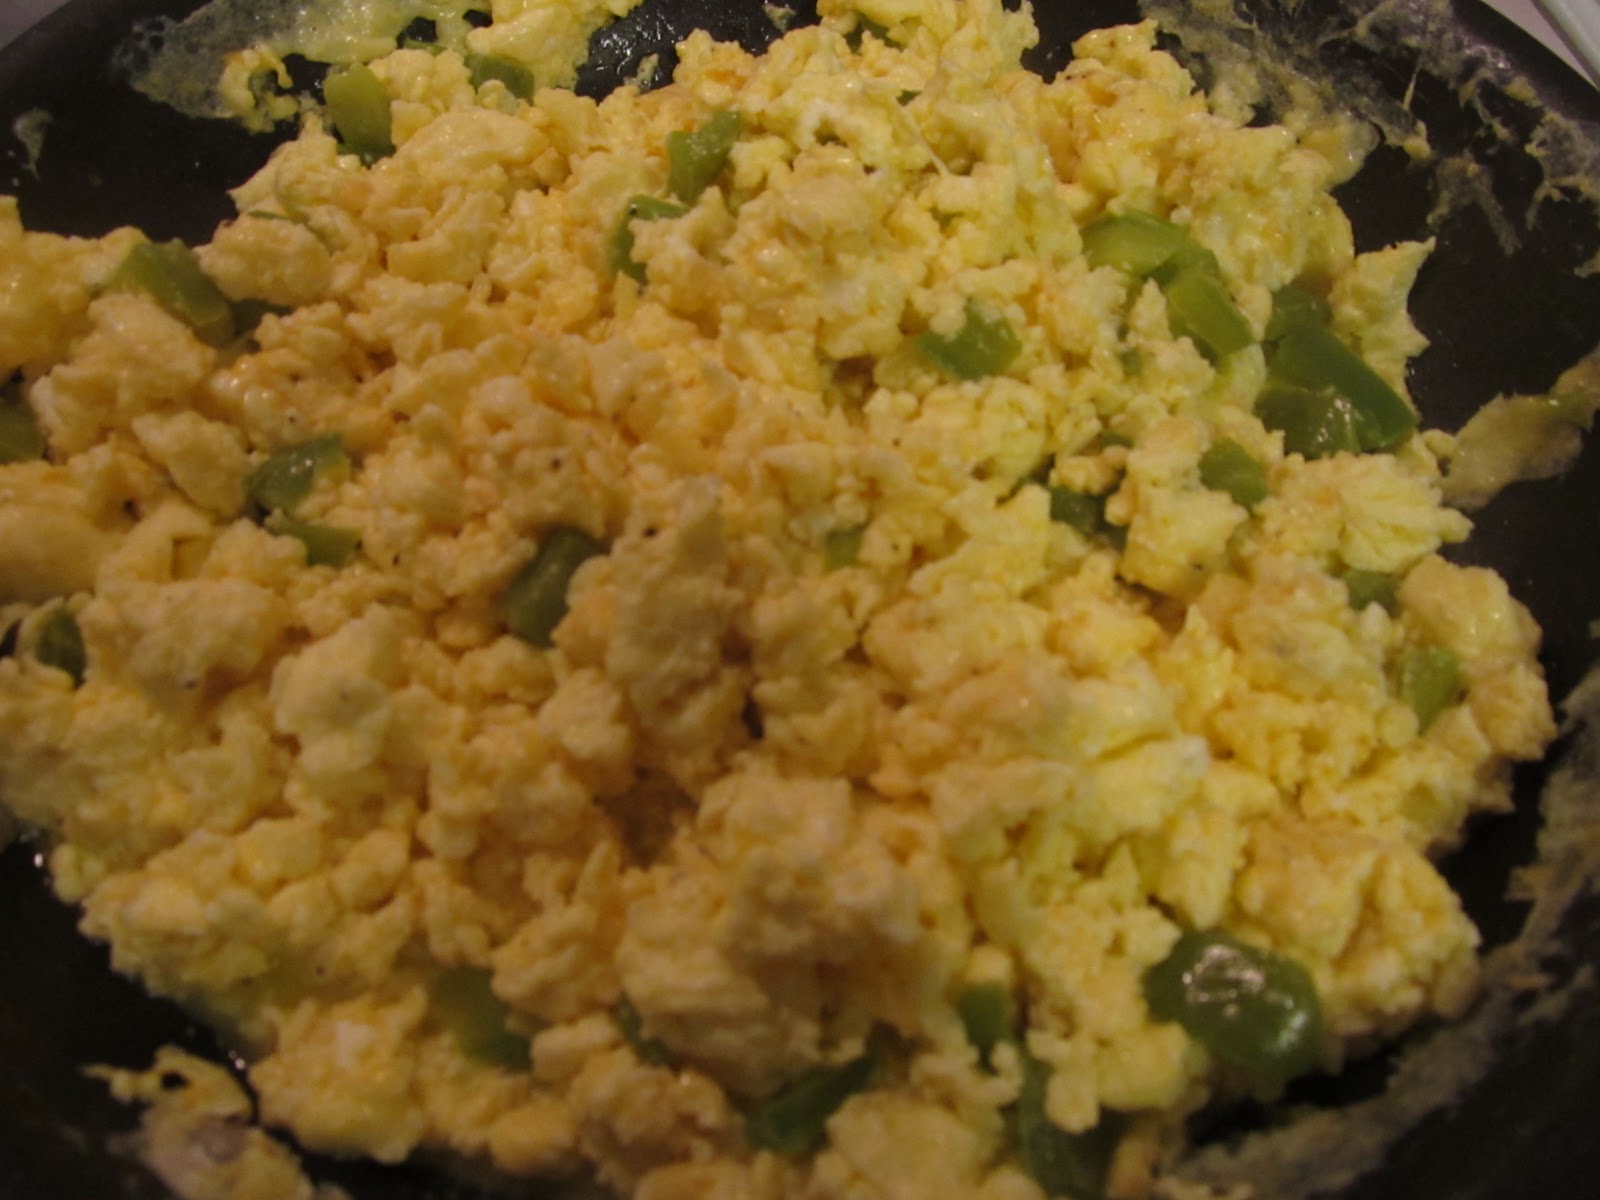
Saute green pepper until crisp/tender in about 1 tbsp butter

Now this is the even sweeter part - the Mister took some pictures!  LOVE it!  He wanted to show the ridiculous amount of eggs I got on sale at Albertson's last week :)

And the pyrex cup that he mixed the eggs (he used NINE, no you don't have to use that many, NO we did not eat that many, it was TOO much), about 1/3 cup milk, pepper to taste and whisked it in the pyrex cup.  He then poured it in a nonstick pan that he had already coated with melted butter (1-2 tbsp).    When eggs are beginning to set, scramble them, and continue to scramble them until desired doneness.  

Add choice of cheese and stir in until melted.  Add green peppers and any other additions at this point.

Yum, yum, yummy!!

We all loaded up ours differently - I did sour cream, eggs, salsa - it was fabulous!!  We will be having these again!  Thank you, Hubby!

Saturday, October 1, 2011

Awesomely Yummy King Ranch Chicken

Let me explain this recipe.  This recipe turned into quite a journey for me.  I made King Ranch Chicken a few years ago and my husband & I were not liking the recipe.  The flavor was all off.  Bland.  Boring.  If you were ever lucky enough to have King Ranch Chicken from Celebrity Bakery, back when they were still around, I wanted it to taste like that.  A little kick, just enough, but not too much.

So I took a few years off, then found this recipe in my Southern Living Best Fall Recipes, so I thought it was time to try it again.  Now, this time the recipe had me making my own chicken broth, using a whole chicken, things I wasn't used to and thought I was crazy for attempting!!  I was cursing this recipe from the beginning, thinking "why did I think this was a good idea??!?"

Well, I'll tell you why!!  BECAUSE IT'S AWESOME!!  After I tasted the final product I thought, "Totally worth it"!  The boiling the whole chicken, making my own stock, shredding my own chicken. Totally, awesomely, worth it.  This stuff is good, friends!!  Like me, you'll thank yourself when you're done!!
For this recipe you'll need:
  • 1 tbsp butter
  •  1 medium onion, chopped
  • 1 medium sized green bell pepper, chopped
  • 1 garlic clove, pressed (I smashed and chopped mine - and used 3 cloves :)
  • 1 can cream of mushroom soup
  • 1 can cream of chicken soup
  • 2 (10 oz) cans diced tomatoes and green chiles, drained
  • 1 tsp dried oregano
  • 1 tsp ground cumin (I didn't have any cumin on hand, i.e. I forgot it the two times I went to Target this week, but it was just fine without it)
  • 1 tsp chili powder (original recipe called for Mexican style chili powder, but I used regular)
  • 3 cups grated sharp Cheddar cheese
  • 12 (6 inch) fajita size corn tortillas, cut into 1/2 inch strips

You'll also need:
  • (4 1/2 to 5 lb) whole chicken
  •  2 celery ribs, cut into 3 pieces each
  • 2 carrots, cut into 3 pieces each


Okay, this is the part that threw me for a loop.  I was not prepared for dealing with the "whole chicken".  But, I put my big girl pants on and did what I had to do.  "Remove giblets" apparently means sticking your hand in a freezing cold chicken carcass and taking out whatever you can pull out.  Yuck.  I did that.  But I didn't like it.  

I rinsed my sad little bird and put it in a stock pot (original recipe called for a Dutch Oven, but again, don't have a Dutch Oven so stock pot it was).  After bird was in the pot, I covered it with water and added my carrots and celery, brought to a boil over medium high heat; covered, and reduced heat to low.  Simmer for 50 minutes to an hour or until chicken is done.  It took me longer than an hour for mine to cook, just keep checking until it's done.  I didn't take an after picture bc I honestly thought it wasn't going to be edible.  That's the zero confidence I had in my chicken stock/chicken experiment.

But I continued to follow the directions, let it cool for 30 minutes, removed the chicken from broth, reserve 3/4 cup cooking liquid (I ended up using about 1 cup instead).  Strain any remaining liquid; reserve for another use - does anyone have any good ideas about how to store chicken broth?  Because this made a ton.  More on that later...

Okay, so I wasn't feeling super confident about my broth/chicken, but I decided to soldier on...

Melt butter in large skillet over medium heat.  Add onion, saute 6-7 minutes or until tender.  Add bell pepper and garlic, and saute 3-4 minutes.  Stir in reserved broth, soups, rotel, and spices.  Cook and stir for 8 more minutes.

Then it will look like this.  I have to admit, it was starting to smell good and I was starting to have a little bit of hope for this recipe.  Not a lot of hope, but some, nonetheless.  So I began shredding the chicken.  Whole chicken yield A. LOT. of chicken!  This was another teaching moment for me.  I bought the whole fryer chicken for 4 dollars this week.  That's a ton of chicken for 4 dollars!  Totally cheaper than buying chicken breasts or tenders or whatever!   If I can just get past the whole "this whole raw chicken grosses me out" thing, I'll be good.

Layer half of the chicken in a 13x9 baking dish - I greased mine with olive oil.

Then top chicken with half the soup mixture and a cup of cheese

Then top with half of the tortilla strips.  Repeat the layers once more, topping with one more cup of cheese.  Cover and put in 350 oven for 50 minutes... 

then uncover and bake for 10-15 minutes more.  It was smelling GOOD at this point!!  I was hoping it was as good as it smelled!!

It came out looking bubbly and yummy!  Let stand for 10 minutes before serving.

For a side, I got out a can of pinto beans, rinsed and drained them, and put them in a pan.  Then, since I had a BOATLOAD of chicken broth in the fridge, I poured some chicken stock in with the pinto beans, added some season salt, pepper, and sea salt, and presto!  Yummy side!

Totally worth every minute!!  Next time I will make this on the weekend, but be assured, I will make this again!!