Showing posts with label chocolate. Show all posts

Monday, October 15, 2012

Nutter Butter Truffles/Oreo Balls

These little gems are a little bite of heaven.  So easy, but so yummy!!  Like cake balls, but easier to make and did I mention easy??  So. easy!  All you need is a food processor and:
  • Oreos (pick your flavor, more on that later) or Nutter Butters - regular size package
  • 8 oz block of cream cheese (room temperature)
  • white or chocolate Almond bark
That's all you need!  And not baking required.  This is a monthly must-have for our bunco nights & I've been having some fun with it lately, trying out new variations.  Regular Oreos (not double stuf) are the easiest, but I've also tried Mint Oreos & I think you could use about 3/4 of the cream cheese block for those bc there is more creme in the cookie.  I recently made the Nutter Butter truffles & they turned out to be everyone's favorite of the three! (My bunco girls are my sample set :)  I made it as you'll see, but I also think for this variation you could use 1/2 a block of cream cheese & about 1/4-1/2 cup of peanut butter & you'd end up with a creamier truffle with more in-your-face peanut butter flavor.  But, as I said, the girls liked the Nutter Butter truffles the best of the 3, so maybe they're perfect just the way they are?  You decide & let me know :)

Here are a few pics of the process below - I'm sad to say I didn't get the finished product - this season of life is too crazy & these were eaten too quickly!  So use your imagination & think yum, yum, yummy!!

Just dump entire package of cookies (oreos or nutter butters) directly into food processor...

pulverize to crumbs are all the same size, then add block of cream cheese...

After thoroughly mixed it will look like this - that's perfect!

Then scoop and shape the balls.  These are all pretty uniform, but if I use a melon baller they are huge, if I make them smaller, there's a million, so just decided what you'd like.  This batch made two of these pictures above, so quite a few & there wasn't enough coating for all of it, so just size them the way you prefer.

After rolling all the balls, put in the refrigerator for about 30 minutes to chill before coating.  You can leave them in longer, but 30 minutes usually works well.  I think for this batch I made the balls one day & dipped them the next, that worked great for the time I had.

Then get out your almond bark - I use CandiQuik because it has it's own tray so the cleanup is super easy.  But I've also tried almond bark brand and I hope to try melting chocolate chips with baking wax sometime soon, but there just wasn't enough time on this day!  I chose regular chocolate for the nutter butter balls, but usually I use white chocolate for the oreo balls.  You could also use contrasting chocolates to make designs on the top of the balls, but I never have time for that & they still taste good! :)

Follow the directions for melting on the package & then you're ready for dipping!  Dip the truffles, letting the excess run off, place on wax paper & back in the fridge to set.  It sets fairly quickly and you're good to go!  So tasty, easy, and great to take to parties.  Such an easy go-to dessert.  Enjoy!!

Sunday, August 5, 2012

Must Try Brownie S'mores

Easiest breakthrough ever, Cowtown friends:  make these brownies, put between two graham crackers and ENJOY!!  Seriously, perfect s'more with no campfire & no mess.  If you follow the Cowtown Cooking page on FB, you already saw this breakthrough.  Let me tell you, it's SO good!!  The graham cracker is a perfect compliment to the super sweet brownie.  I didn't know it could get any better.  A must try!!

Saturday, May 12, 2012

Chocolate Saltine Toffee

This is a recipe I got from Pinterest & made for bunco the other night.  And then I ate WAY too much of it the following day.  Be warned:  this stuff is seriously addicting!!!  And sinfully good!!!  And all you need is:
  • saltines
  • 1 cup butter
  • 1 cup brown sugar
  • 12 oz bag semi sweet choc chips (about 2 cups)
And all you have to do is:

Line a greased (with cooking spray), foil lined cookie sheet (or jelly roll pan) with saltines.  I just used as many saltines that fit in my pan.

Then, melt butter and brown sugar in saucepan until sugar is melted and combined.  I really had to watch it bc it will boil, but you don't want it to burn, of course.  It took about 10 minutes and it needs to boil and then reduce to simmer, but you'll know it's done when the granules are gone & it's all mixed together.

Then pour sugar mixture over saltines - the saltines will move (obviously based on the pic :) and that's fine.  Then put in 350 degree oven for 8-10 minutes until toffee is bubbling.

Take out oven and let stand 3-5 minutes before pouring chocolate chips over mixture.  Let stand about 5 minutes more for chocolate chips to melt.

Then spread over mixture.  Here's half and half for you to see :)

Then I let it cool on the counter bc I wasn't in a hurry, but it took forever so I stuck it in the fridge.  After it was hard enough, I broke it in to pieces and put it on a pretty plate...  after tasting it, of course!  And, oh my word!!!  Easiest, yummiest, going-to-make-my-pants-to-tight delicious!!
Happy Mother's Day, Chocolate Lovers!!

Enjoy!!

Saturday, November 19, 2011

Banana Cake with Cream Cheese Frosting

I don't have all my organized pictures for this one bc I was throwing it together to take to our church Thanksgiving dinner and decided at the last minute to document and share with y'all!  This one is easy & yummy & has bananas and chocolate!!  Haha!!  I'm obsessed with that combo lately!!

For this recipe, you'll need:
  • 1 package Duncan Hines Yellow Cake Mix (+ eggs and oil per box instructions)
  • 2 bananas, smashed (I used three this time bc I was feeling crazy that way)
  • 1 - 8 oz block cream cheese
  • 2 1/2 c. powdered sugar
  • 1 tsp vanilla
  • splash milk
  • Package mini chocolate chips

Mix cake mix according to package directions

Add smashed bananas and bake according to package directions.  I usually make two round pans for this cake, but since I was taking it to church, I just made a 9x13 pan.  Bake and cool completely before frosting.

Beat powdered sugar, cream cheese, vanilla.  Keep adding milk a little at a time until you like the consistency.  Frost cake.  When I frost the two round cakes, I frost between the layers and add chocolate chips as well.  Then I frost around the cakes and put the chocolate chips all over - SO yummy!

But for the purposes of this cake, I just frosted the top and topped it with chocolate chips - still excellent!  :)  

I will say, though, that the flavors of this cake taste best if you make it a day ahead.  I made mine & took it straight to church & kept thinking it didn't taste quite right.  But the next day for breakfast dessert?  All the flavors had become friends and it was AWESOME!!

So awesome that this was the last piece of cake!  We ate it so fast this is the only picture!  Try it, you'll love it!

Monday, November 7, 2011

Chocolate Peanut Butter Cookies

I have deemed it cookie week on Cowtown Cooking!  It just so happened that works nicely into my life this week, so here it is!  The first of my cookies I'm going to share came from the back of the Duncan Hines box - yes, friends, it's super duper easy!  And, yes, I do think I have an addiction to all things chocolate peanut butter lately.  I need to seek help for that...
All you need is:
  • a box of Duncan Hines Chocolate Peanut Butter Brownie Mix
  • 3/4 cup mini Reese's pieces (about half the bag)
  • 1 large egg
  • 1/3 cup vegetable oil
  • 2 tbs water


Add egg, oil, and water to brownie mix.  Then what does it need?

Some color?
Add Reese's.  Mix.

Bake in 375 degree oven for 7-8 minutes - yes, friends, it's really THAT easy!!

**I will say that this recipe doesn't make that many cookies.  Since I like to bake & share, I will probably make a double batch next time around...since no one likes to run out of cookies!  But that should be easy:  two boxes of brownie mix, two eggs, 2/3 cup of vegetable oil, 4 tbs water, and a whole bag of mini Reese's & I'll be set.

And SO tasty!  Especially right out of the oven with a big glass of milk!
Viva la cookie!!

Tuesday, October 18, 2011

Another Chocolate Peanut Butter PSA

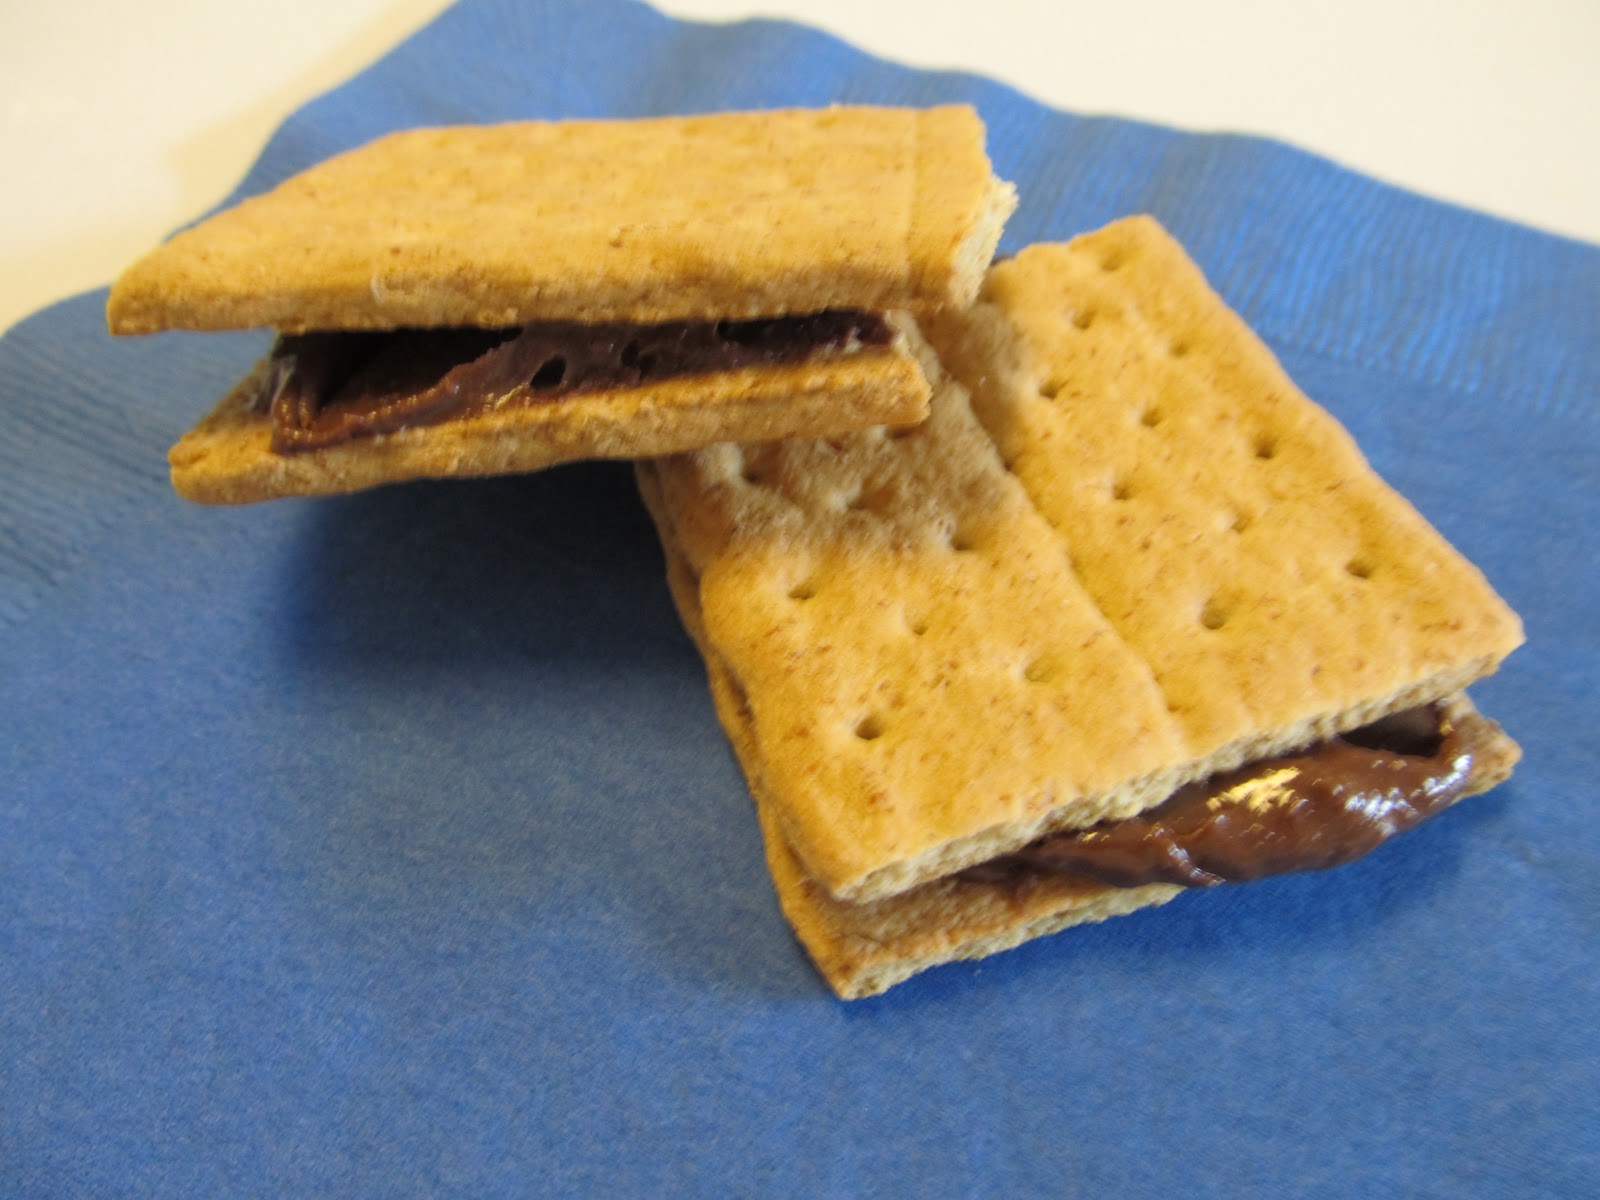
It makes great graham cracker-chocolate peanut butter sandwiches.  Perfect for an afternoon snack.  Or breakfast.  Pick your pleasure.
Who knew CPB was so versatile?

Get ready, Cowtown Friends, tomorrow we have brisket on the menu!!

Thursday, September 29, 2011

A Must Try for Chocolate Banana Enthusiasts...

Apparently, I now count myself as a chocolate banana enthusiast.  Never thought I was before, but anything chocolately/bananay lately has been on my mind.  Why have I NEVER tried this before?!?!  I have no idea.  But decided it was a good decision.  So yesterday, I got these...
That's right, Hershey's Special Dark chocolate chips.  It should just say "Sarah's Heaven in a bag".  
Mixed in 1/2 a bag with this recipe - and I added about an extra cup of extra ripe bananas as well...

Folded in the chips until just mixed...

Baked...


And ate WAY too much with a cold glass of milk.  Heavenly.  Seriously, why didn't I try this sooner??

Sunday, September 25, 2011

Tollhouse Chocolate Chip Cookies

I'm going to get on a soapbox here for a moment.  I got this recipe off the back of the chocolate chips bag.  It took me less than 15 minutes to make the batter.  It took me less than 5 minutes to get them on the baking sheet.  It took about 9 minutes to bake.  They were about ONE MILLION times better than any slice & bake/refrigerated cookie dough - I promise!!!  I know that slice & bake cookie dough seems so easy and yummy but stop the madness, friends!!  Make them from scratch!!  So. much. better!!  Okay, I'm off my soapbox now, back to cooking...
For these, you'll need:
  • 2 1/4 cups all purpose flour
  • 1 tsp baking soda
  • 1 tsp salt
  • 2 sticks (1 cup) butter, softened
  • 3/4 cup granulated sugar
  • 3/4 cup packed brown sugar
  • 1 tsp vanilla extract
  • 2 eggs
  • 12 oz pkg Nestle Toll House Semi Sweet Chocolate Chips
  • 1 cup chopped nuts, optional


Combine flour, baking soda and salt in small bowl.

Beat butter, granulated sugar, brown sugar, and vanilla in large bowl until creamy.  I just mixed this with spoons instead of a mixer.  I got my butter out a little beforehand to let it soften a bit so it was easy to mix.  It worked out fine.  Add eggs, beating well after each addition.

Gradually add flour mixture until well mixed.  Stir in chocolate chips and nuts, if desired.

Drop by rounded teaspoon onto ungreased baking sheet (I used parchment paper).  Bake 9-11 minutes at 375, or until golden brown.

Cool on baking sheets for 2 minutes, then move to wire racks.

Then see if you can set a personal best for how many cookies you can inhale in one sitting.  I'll share with y'all my personal best another day.  But they're that good, I assure you!  Enjoy!!

Saturday, September 10, 2011

Public Service Announcement for Banana/Chocolate Lovers

I'm taking a break from my football fare to share with you this very important culinary breakthrough.  You'll be glad you stopped by today!

I made banana bread the other day from my favorite red & white Better Homes & Gardens cookbook.  This would have been uneventful and not blogworthy had I not had an epiphany right there in the kitchen.  You see, I remembered while I was mixing together the ingredients, that I had this in the pantry...

Do you see what it is??  That would be Dark Chocolate Peanut Butter.  And I was making banana bread. Seriously, what could be more perfect??!?  They're made for each other!!  That just made me mix even faster.  Because I wanted it to bake.  And I wanted it to cool a little.  So I could slather it with Dark Chocolate Peanut Butter. And then I could eat it.  A lot of it.  So I mixed the batter.
Baked it.

Sliced it.

And covered it with Dark Chocolate Peanut Butter.  While the bread was still warm.  Yes, you see it oozing all over the bread right there.  That is just how it looked.  On my plate.

Oh. my. word.

If you like bananas/chocolate/peanut butter anything, you must. try. this!!!!

So, if you'd like to make the banana bread, you'll need:

  • 1 1/2 cups all purpose flour
  • 1 1/2 tsp baking powder
  • 1/4 tsp baking soda
  • 1/4 tsp ground cinnamon
  • 1 egg
  • 1 cup mashed bananas (3 medium, just beginning to turn dark)
  • 3/4 cup sugar
  • 1/4 cup cooking oil
  • 1/2 cup chopped walnuts or pecans (optional)
1.  Grease the bottom and 1/2 inch up the sides of the 8x4x2 inch loaf pan; set aside.  Combine flour, baking powder, baking soda, cinnamon, and 1/8 tsp salt.  Make a well in center of dry mixture, set aside.
2.  In another bowl combine the egg, bananas, sugar, cooking oil.  Add egg mixture all at once to flour mixture and stir until just moistened.  Fold in nuts (if desired).
3.  Spoon batter into loaf pan and bake at 350 for 50-55 minutes or until wooden toothpick comes out clean.  Cool on wire rack for 10 minutes.  Remove loaf from pan, cool on rack.

Slice.  Then slather with Dark Chocolate Peanut Butter.  
One more look for good measure.

Can you believe my husband refused to try this?!?

I think he missed out.  Don't you???

Because it was amazingly yummy.  Like, seriously, amazingly yummy.

Cowtown Peeps, you can find this glorious DCPB at Super Target.  Hope you enjoy it as much as I do!  I'm off to eat some more banana bread!

Saturday, August 27, 2011

Super Easy Gooey Caramel Chocolate Cake

I guess I've been craving caramel these days?!  This is one of our favorite easy recipes from Paula Deen's cookbook (or "Mrs. Paula" as my son refers to her :)  It's so easy and yummy, always a hit when we take it somewhere.  This week I made this for a church function and it was enjoyed by all!  The original recipe calls for a devil's food cake mix, but this time I used a triple chocolate cake mix - oh. my. word!! Caramel, chocolate, fudgey goodness!!  Yum!!
You'll need:
  • chocolate cake mix (+ eggs, vegetable oil, water, per package directions)
  • jar of caramel topping
  • one can sweetened condensed milk
  • Cool Whip (optional, for topping)


Here's a closeup of the mix I used - for chocolate lovers, this is a MUST!!

The only difference with this cake mix, was that it baked up a little funky because it had the fudgey swirl and extra chocolate chunks.  This cake isn't really pretty, but it's a crowd pleaser so I figure that's what's important.

Immediately after baking, pierce the top of the warm cake all over with a toothpick (I used a fork).  Pour the sweetened milk and caramel over the top.  The original recipe calls for 6 oz of caramel, but the jar is 12 oz.  So I may have used the whole jar.  I figured it would only make it better, right?  Yes.


After pouring it over, use a spatula (or back of a spoon) to spread the caramel mixture around the top of the cake.  Let cool a little more and then put it in the refrigerator to chill until ready to serve.

Like I said, this isn't a "pretty cake", but it's yummy flavor makes up for it.  Here it is right out of the refrigerator.  I sliced it up and grabbed my cool whip for serving.

It was hard to get a good picture, but see the ooey gooey goodness!!  In the original recipe, she tops it with cool whip and crunched up Skor bars, but our family likes it simple with cool whip or just straight cake!

Chocolate lovers, you are welcome!!   Yum!!

Wednesday, August 3, 2011

Mississippi Mud Brownies

If you make nothing else from my blog, you MUST try these brownies!!  I've been making these for a few years (I got the recipe from a friend who also said I could share :), and they always get rave reviews!  Everyone LOVES them.  They are so chocolatey, gooey, sinful, and the best part:  EASY!!

All you need is:
  • Family size brownie mix (9x13 size) make according to package directions (eggs, oil, water)
  • marshmallow creme
  • tub of chocolate frosting
Bake brownie according to package directions.  After the brownies have baked and shortly after you've taken them out of the oven, spoon marshmallow over the top.  Let the marshmallow creme melt and spread.  

Empty tub of frosting into a microwave safe bowl.  Melt in microwave at 30 second increments until melted...

...to this consistency.  Then pour over marshmallow creme.  Spread around to cover entire brownie.  Allow frosting to cool and firm up.  I usually put it in the refrigerator for storage, but I don't think it's absolutely necessary.

I'm telling you - it's sinful!  Is that the theme of this week??

This picture does not do them justice - these brownies are SO good!!

Tuesday, August 2, 2011

Dinosaur Cake

My son asked me to make his birthday cake for the first time ever this year.  Ignoring my perfectionist tendencies, I agreed, hoping that I would be able to make something that resembled a dinosaur that he would actually enjoy.  I found this recipe online and it was pretty easy for the most part.
I just baked the two cakes,

cut it following the directions, then "crumb coated" the cake to seal in the crumbs before frosting.  The crumb coat was a great tip from the recipe & really helped make the cake look better in the end.  Yes, the dinosaur was whimsical, but the birthday boy loved it!

I used candy melts, m&m's, and a tiny bit of white frosting for the eyes and mouth.  As worried as I was, it was worth every minute when the birthday boy was so happy when he saw the cake!

Have you made your child's birthday cakes?  What have you tried?