Showing posts with label cream cheese. Show all posts

Monday, October 15, 2012

Nutter Butter Truffles/Oreo Balls

These little gems are a little bite of heaven.  So easy, but so yummy!!  Like cake balls, but easier to make and did I mention easy??  So. easy!  All you need is a food processor and:
  • Oreos (pick your flavor, more on that later) or Nutter Butters - regular size package
  • 8 oz block of cream cheese (room temperature)
  • white or chocolate Almond bark
That's all you need!  And not baking required.  This is a monthly must-have for our bunco nights & I've been having some fun with it lately, trying out new variations.  Regular Oreos (not double stuf) are the easiest, but I've also tried Mint Oreos & I think you could use about 3/4 of the cream cheese block for those bc there is more creme in the cookie.  I recently made the Nutter Butter truffles & they turned out to be everyone's favorite of the three! (My bunco girls are my sample set :)  I made it as you'll see, but I also think for this variation you could use 1/2 a block of cream cheese & about 1/4-1/2 cup of peanut butter & you'd end up with a creamier truffle with more in-your-face peanut butter flavor.  But, as I said, the girls liked the Nutter Butter truffles the best of the 3, so maybe they're perfect just the way they are?  You decide & let me know :)

Here are a few pics of the process below - I'm sad to say I didn't get the finished product - this season of life is too crazy & these were eaten too quickly!  So use your imagination & think yum, yum, yummy!!

Just dump entire package of cookies (oreos or nutter butters) directly into food processor...

pulverize to crumbs are all the same size, then add block of cream cheese...

After thoroughly mixed it will look like this - that's perfect!

Then scoop and shape the balls.  These are all pretty uniform, but if I use a melon baller they are huge, if I make them smaller, there's a million, so just decided what you'd like.  This batch made two of these pictures above, so quite a few & there wasn't enough coating for all of it, so just size them the way you prefer.

After rolling all the balls, put in the refrigerator for about 30 minutes to chill before coating.  You can leave them in longer, but 30 minutes usually works well.  I think for this batch I made the balls one day & dipped them the next, that worked great for the time I had.

Then get out your almond bark - I use CandiQuik because it has it's own tray so the cleanup is super easy.  But I've also tried almond bark brand and I hope to try melting chocolate chips with baking wax sometime soon, but there just wasn't enough time on this day!  I chose regular chocolate for the nutter butter balls, but usually I use white chocolate for the oreo balls.  You could also use contrasting chocolates to make designs on the top of the balls, but I never have time for that & they still taste good! :)

Follow the directions for melting on the package & then you're ready for dipping!  Dip the truffles, letting the excess run off, place on wax paper & back in the fridge to set.  It sets fairly quickly and you're good to go!  So tasty, easy, and great to take to parties.  Such an easy go-to dessert.  Enjoy!!

Thursday, July 26, 2012

Green Chile Chicken Casserole

Soooo, it's been awhile since I've posted!  Summer has been busy!  Here's an easy favorite that feeds our family these days.  
For this recipe, you'll need:
  • 1 10 oz can green chile enchilada sauce
  • 1 4 oz can green chiles (I usually use MILD, but if you're brave - go for it!)
  • 4 oz block of cream cheese (half of the block)
  • 2 cups (or so) chopped cooked chicken
  • 1 cup shredded cheese (I used colby jack this time, but monterey jack or anything would work, choose what you like)
  • tortilla chips


Mix first 4 ingredients in a pan on stove and heat through.  Sprinkle a layer of crushed tortilla chips in greased pan, top with half of chicken mixture.  Repeat the layers and top with tortilla chips and cheese.  
Bake for 10-15 minutes at 400 degrees or until a nice crust forms on the top - then you'll know it's ready!

Tastes like a yummy enchilada, without so many steps!  Great for weeknight dinner with corn - easy dinner for the family.  Enjoy!

Saturday, November 19, 2011

Banana Cake with Cream Cheese Frosting

I don't have all my organized pictures for this one bc I was throwing it together to take to our church Thanksgiving dinner and decided at the last minute to document and share with y'all!  This one is easy & yummy & has bananas and chocolate!!  Haha!!  I'm obsessed with that combo lately!!

For this recipe, you'll need:
  • 1 package Duncan Hines Yellow Cake Mix (+ eggs and oil per box instructions)
  • 2 bananas, smashed (I used three this time bc I was feeling crazy that way)
  • 1 - 8 oz block cream cheese
  • 2 1/2 c. powdered sugar
  • 1 tsp vanilla
  • splash milk
  • Package mini chocolate chips

Mix cake mix according to package directions

Add smashed bananas and bake according to package directions.  I usually make two round pans for this cake, but since I was taking it to church, I just made a 9x13 pan.  Bake and cool completely before frosting.

Beat powdered sugar, cream cheese, vanilla.  Keep adding milk a little at a time until you like the consistency.  Frost cake.  When I frost the two round cakes, I frost between the layers and add chocolate chips as well.  Then I frost around the cakes and put the chocolate chips all over - SO yummy!

But for the purposes of this cake, I just frosted the top and topped it with chocolate chips - still excellent!  :)  

I will say, though, that the flavors of this cake taste best if you make it a day ahead.  I made mine & took it straight to church & kept thinking it didn't taste quite right.  But the next day for breakfast dessert?  All the flavors had become friends and it was AWESOME!!

So awesome that this was the last piece of cake!  We ate it so fast this is the only picture!  Try it, you'll love it!

Sunday, August 14, 2011

Baked Tomatoes and Garlic Chicken Puffs

Thanks, Lisa , for sharing these recipes!!  I will be trying them very soon!  The little person in my house will LOVE the baked tomatoes, and the big person in my house will LOVE the chicken puffs!  Yum!

Baked Tomatoes

Ingredients

  • 4 tomatoes, halved horizontally
  • 1/4 cup freshly grated Parmesan cheese
  • 1 teaspoon chopped fresh oregano
  • 1/4 teaspoon salt
  • Freshly ground pepper, to taste
  • 4 teaspoons extra-virgin olive oil

Preparation

  1. Preheat oven to 450° F.
  2. Place tomatoes cut-side up on a baking sheet. Top with Parmesan, oregano, salt and pepper. Drizzle with oil and bake until the tomatoes are tender, about 15 minutes.  **Lisa added that she used mozzarella instead of parmesan with these bc that's what she had and it turned out well.


Garlic Chicken Puffs
yields 32 puffs (I made a double batch)
  • 4 ounces cream cheese
  • 1 tsp garlic powder
  • 1/2 cup cooked shredded chicken*
  • 2 cans refrigerator crescent rolls

Mix cream cheese, garlic and chicken until well blended.
Unroll crescent rolls and cut each triangle into 2 triangles (when you unroll the crescent rolls, 2 triangles are attached making a big square, I just cut from there following the perforation for one cut and made another cut from the other corners = giving you 4 little triangles)
Place 1 tsp of chicken mixture on the center of each triangle and fold the corners in over the creamy mixture.
Place on cookie sheet and bake at 375 for 12-14 mins.
I used 2 cookie sheets at a time, and had to bake 3 batches to get all of mine baked (so allow for that time if you’re making a lot)
Also, mine were ready in about 11 mins, so watch for how your oven cooks.
*For cooked chicken, I buy those big bags of frozen chicken tenderloins, I just threw 6 of them on a cookie sheet and baked for about 25 mins.


Thanks for the pics, too!

And thanks to Emily , for the Beef a la Duestch recipe , we enjoyed it last week - so yummy!!  So yummy that we just ate it right up before I got a picture of it!  If you have a recipe you'd like to share, just leave a comment or send me an email!

Wednesday, July 13, 2011

Green Chile Chicken Enchiladas

I thought I would start with a family favorite.  These are easy peasy enchiladas that everyone in the family loves.  It's a recipe that evolved over the years and you can really vary it anyway you want.  So versatile, so easy, and creates plenty of servings.  And let me add that when I took these pictures, I wasn't thinking of starting a recipe blog so it's not how it will be in future posts.  (Hopefully) future posts will be a little more organized :) But for this recipe you'll just need:
  • chopped cooked chicken (about a pound -  I usually bake the tenders in the oven with olive oil, salt, pepper, and garlic powder for about 15 minutes at 350, this time I also added chili powder - I will have to do a whole other post on chicken)
  • 2 - 14 oz. cans green chile enchilada sauce
  • 1 can diced green chiles
  • cream cheese (about 4 oz, more if you like it extra creamy)
  • 2 cups shredded cheese (I use a Mexican blend of three cheeses)
  • 10-12 tortillas
**Before starting, make sure you spray 9x13 baking dish with cooking spray - I like to use olive oil spray, but regular cooking spray would work - either way, you just don't want your enchiladas to stick!

They are best with fresh tortillas (we sometimes pick them up from Rosa's and that makes it easy), but if you don't have fresh, these will do just fine...

And I actually will use this brand again because it was the perfect amount for my 9x13 baking dish!  No leftover tortillas and all were filled evenly!  Aaahh, the things that make me happy - I must have a sickness...

I like the Hatch brand enchilada sauce, but any will do.  You may want to get mild, though, as some can be pretty spicy.  Spicy with my family is no bueno - ha.
I set up my enchilada prep stations.  Tortillas, filling, cheese, and pan.
Simply combine chicken, green chiles, and about 1/3 of  a can of the enchilada sauce and heat through.  Once heated through, remove from heat, add cream cheese and mix to melt.  I usually get the mini tubs of Philly cream cheese so I can add as much or as little as I feel.  This time I only had one, so it was a little light on the cream cheese.
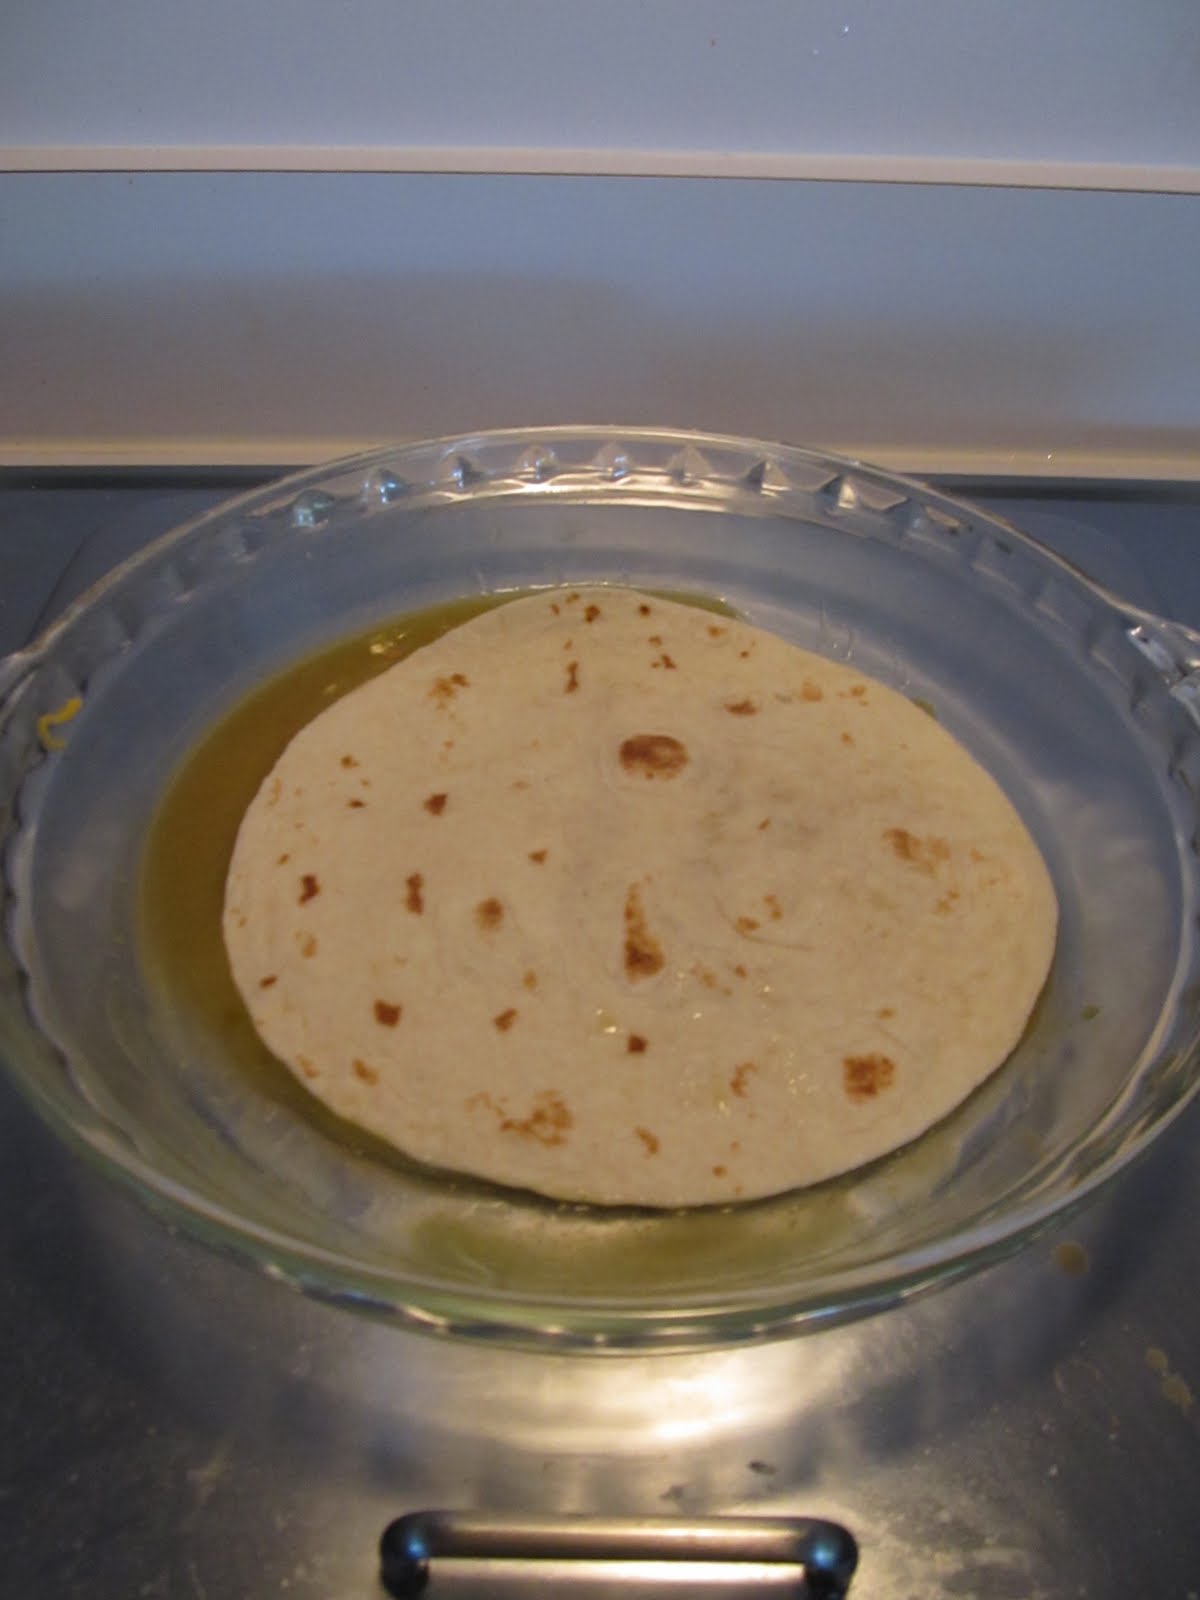
This looks gross, but it's so handy.  Pour a little sauce in a pie plate, 

drop in your tortilla, flip on both sides, then scrape off the excess sauce with your hands.  It's a little messy, but so easy, and eliminates having to presoak your tortillas before filling them with the chicken mixture and cheese.

Simply fill with chicken and cheese then place open side down in the baking dish.  Pour remainder of the first can of enchilada sauce over the filled tortillas.  If baking immediately, pour the other can of enchilada sauce over the filled tortillas (this picture is with the remainder sauce, before I poured the second can), cover with foil, and bake in oven at 350 for about 20 minutes or until bubbly on sides.

This dish can be made the night before - just wait until ready to cook to pour second can of sauce over enchiladas, cover, and bake at 350 for about 45 minutes, or until bubbly on sides.

Wish I had a picture of the final product, but this is the first post - I'll get it together eventually!  I usually serve this with sour cream, Mexicorn, black beans and chips - yum!

What kind of enchiladas do y'all make?  What do you serve it with?